
To begin
We heard some develoepr's voices and are happy to announce that github action is supported to build exclusive app. The administrator can use this feature to trackle app's development and patch.
We would like to thank 老周部落 for his advice.
Agreements
You need to agree to the following terms to distribute app delicate to exclusive bbs:
Attention
This page will guide you build the app with github action and you can also build in a local computer
The comparsion is listed in the following table:
| | Build locally | Github action | | ---- | ---- | ---- | | Flexibility | High(you can compile and change in your way) | Low | | Security | √√√ | √√√√ | | Source update | Git merge or download source from repository | Git merge | | Build speed | Depending on network and hardware configuration | Around 4 minutes | | Extra fee | None | If using time exceeds limits, github may charge you following Github Pricing. | | Github account required | No | Yes |
Take an example
In the following guide, we take QZZN BBS as an example to illustrate how to distribute your exclusive app.
The website of QZZN BBS is https://bbs.qzzn.com/
Technical requiremnents
You need to meet these needs to compile and release your exclusive app:
- A PC
- A verified Github account
- Keytool and other Android SDK
Fork our source code
At the begining, you need to fork the source code in github.(https://github.com/kidozh/DiscuzHub) Click fork.

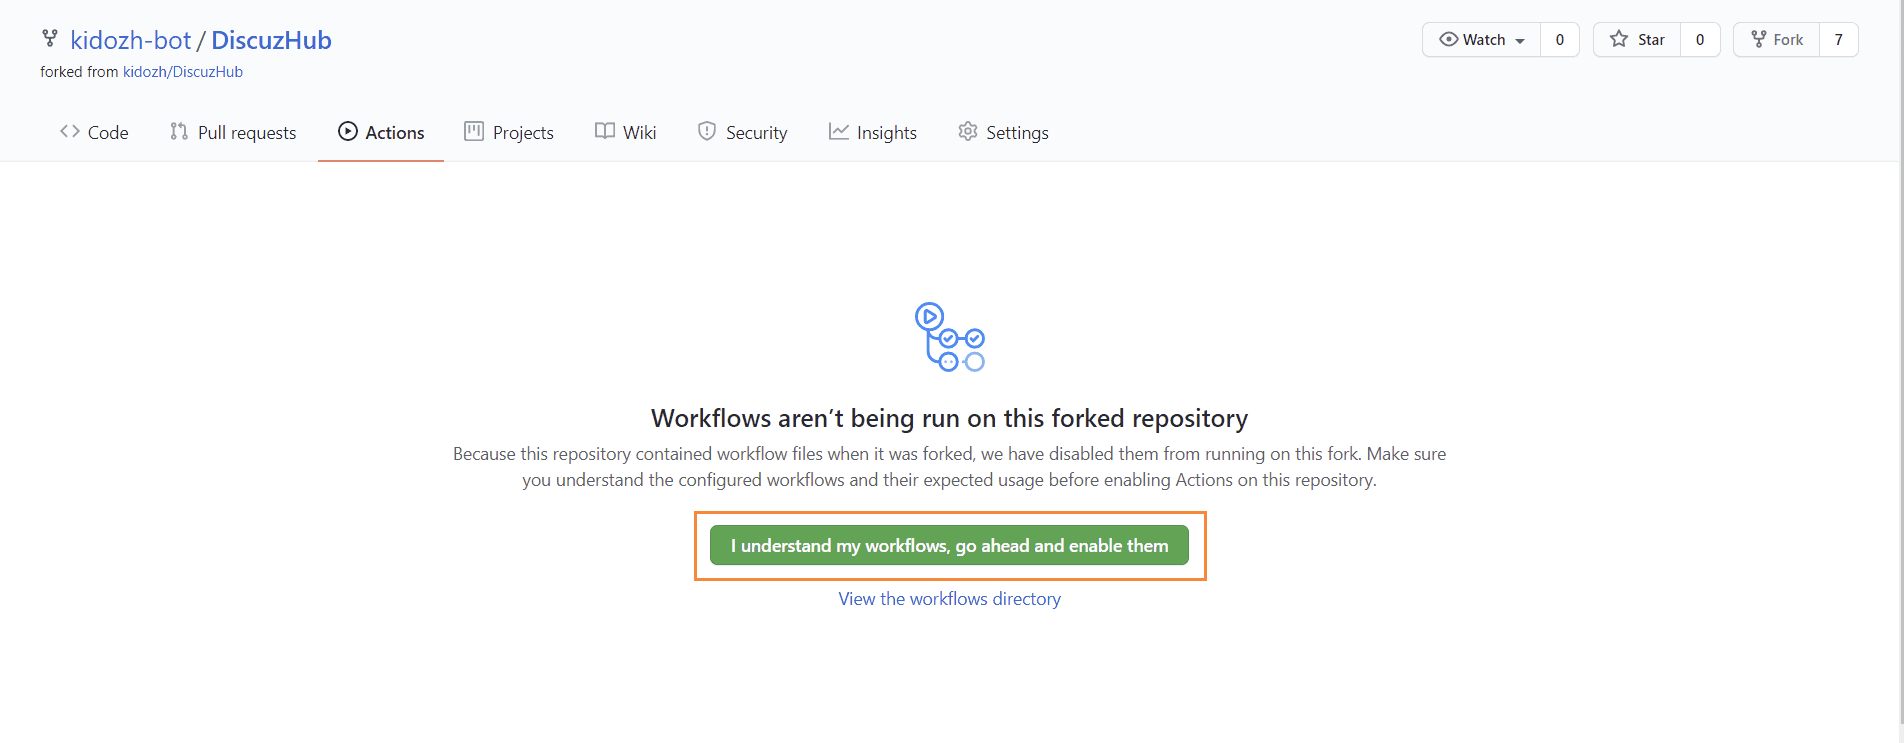
Enable Github action
If you have never used github action, you should enable it to compile app.
Next, configure keystore and sign the app.
Generate keystore
We recommend users to generate keystore file by Android studio with friendly GUI.
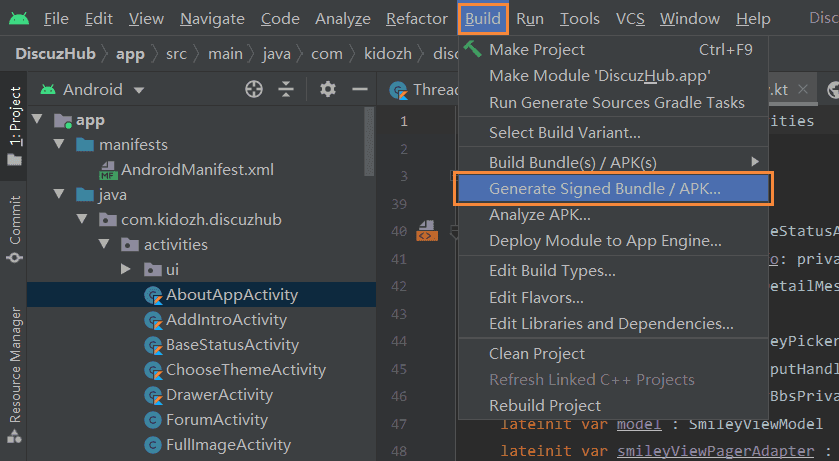
Use Android Studio
Open any directory, select Build->Generate Signed Bundle or APK in navigation bar and press "Create New" in the new dialog to create a keystore.
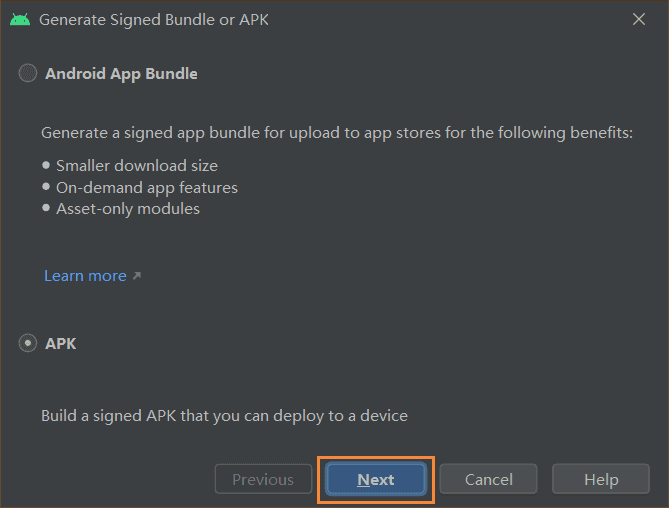
Select any one of them and click Next.
Click Create New to generate new keystore
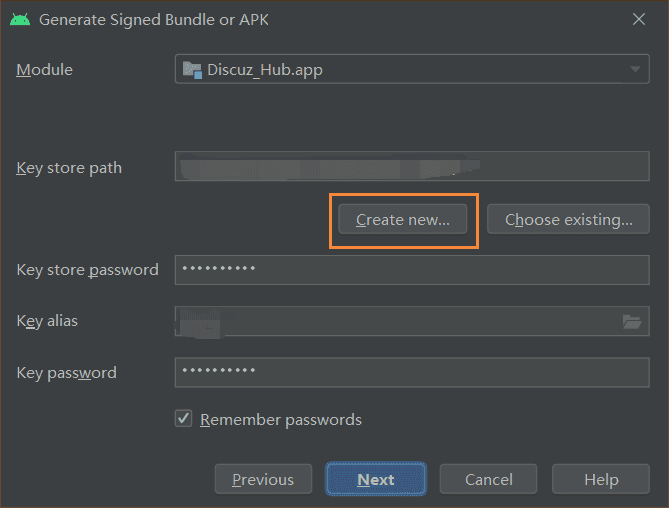
Create a New keystore,after selecting a path and fill relavant information.
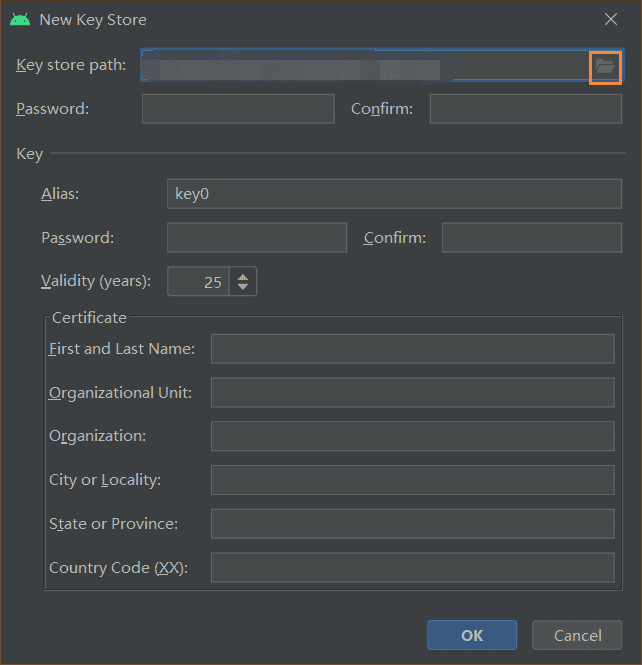
The keystore will be generated at directed path and its suffix will be .jks.
Use keytool
You can also use keytool to generate a keystore.
Configure github secret
The keystore should be confidential and we recommend you to use github secret to pass the information to github action.
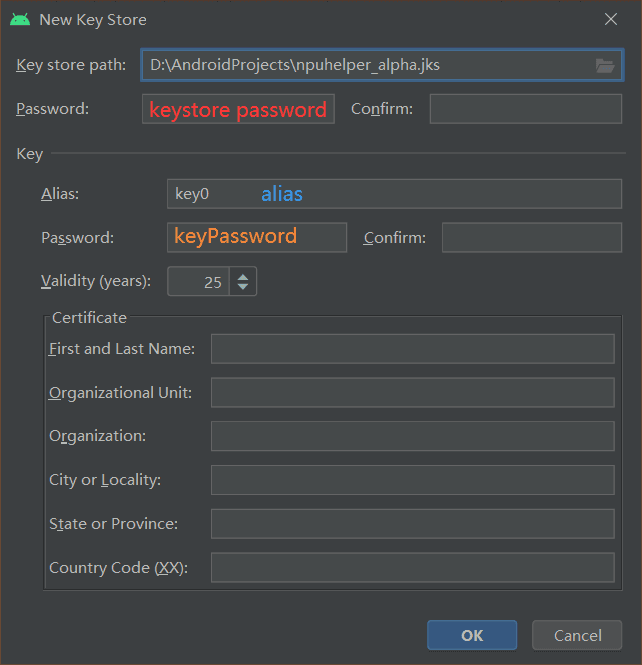
Needed parameters
- signingKeyBase64:base64 encoding of keystore
- alias
- keyStorePassword:The password of keystore
- keyPassword:key's password
generate signingKeyBase64
Run the command
cd THE_KEYSTORE_PATH
openssl base64 < KEYSTORE_NAME.jks | tr -d '\n' | tee some_signing_key.jks.base64.txt
open base64.txt and copy the text to get base64 code.
Fill Github secret information
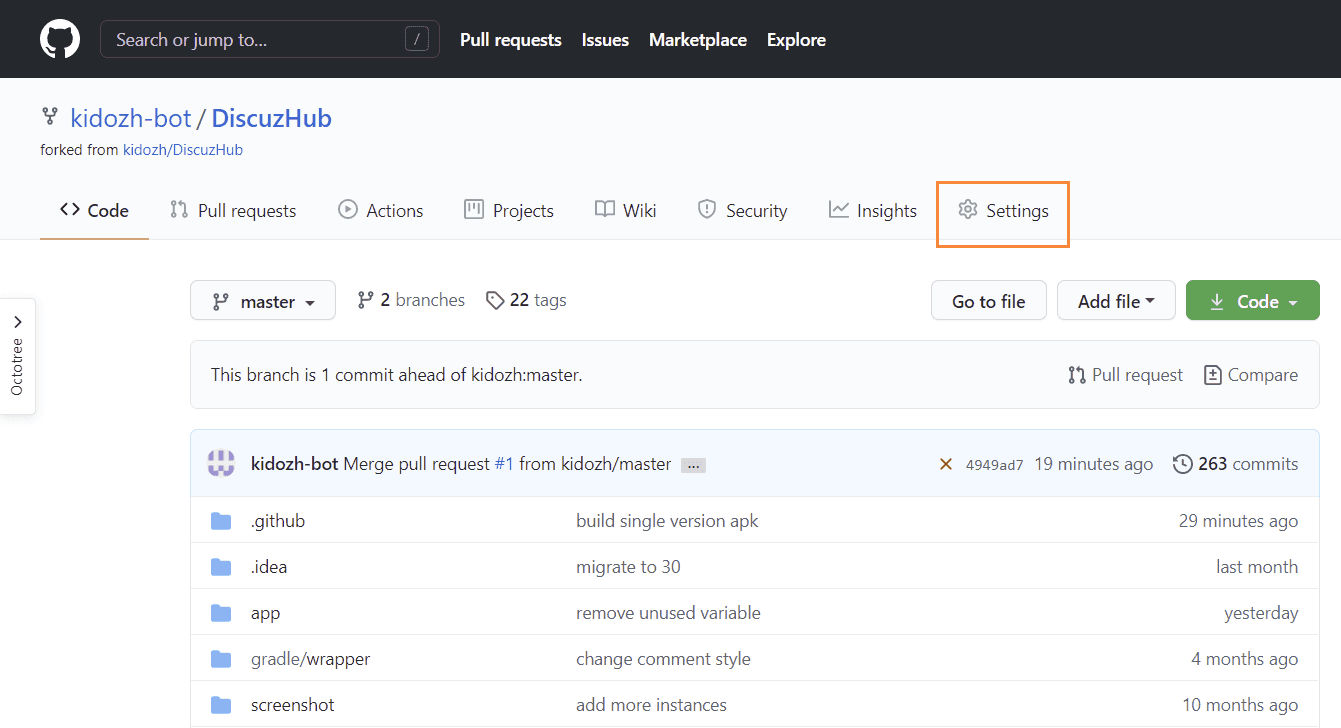
Open forked repository and click Settings
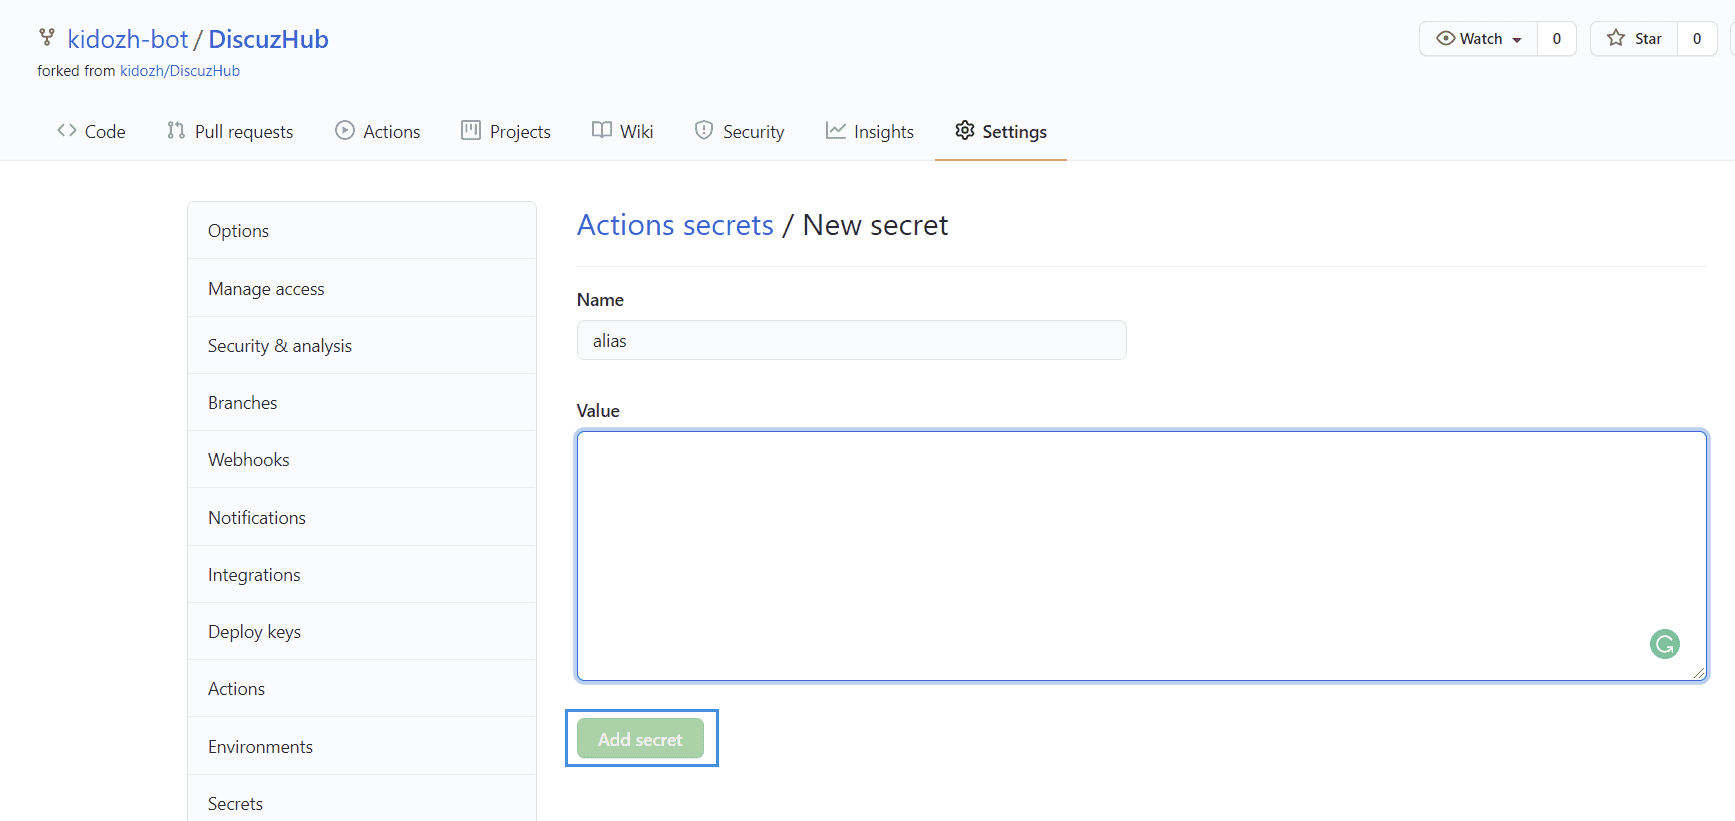
Add github secret
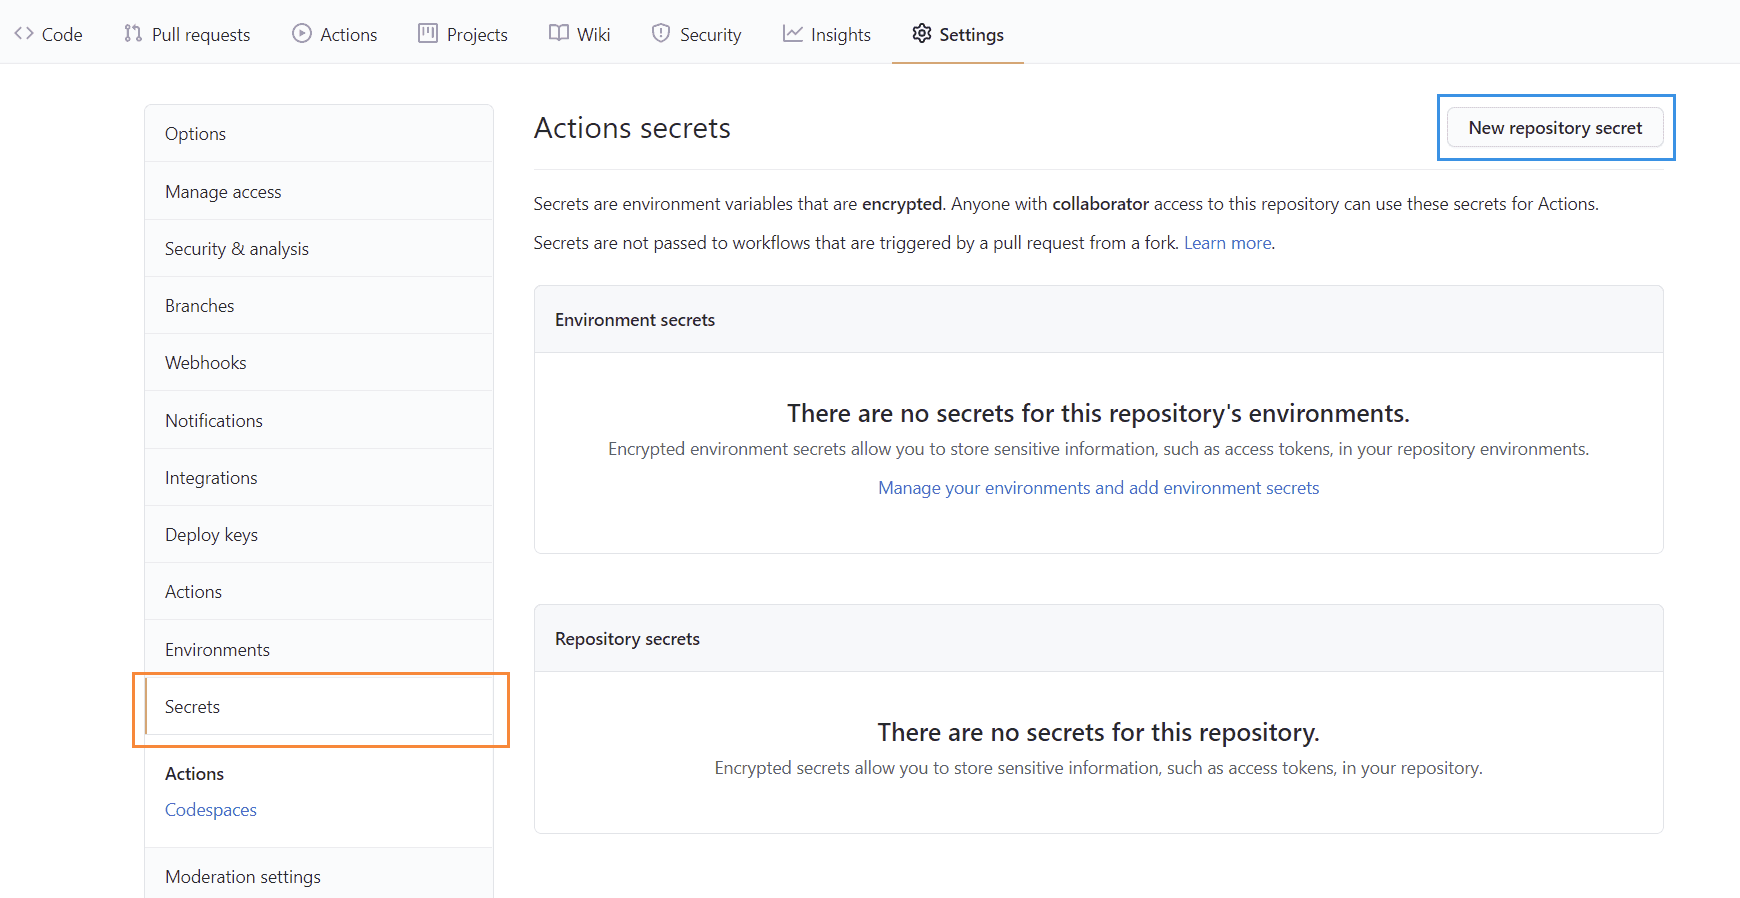
You need to input 4 key-values:
- signingKeyBase64:base64 encoding of keystore
- alias
- keyStorePassword:The password of keystore
- keyPassword:key's password
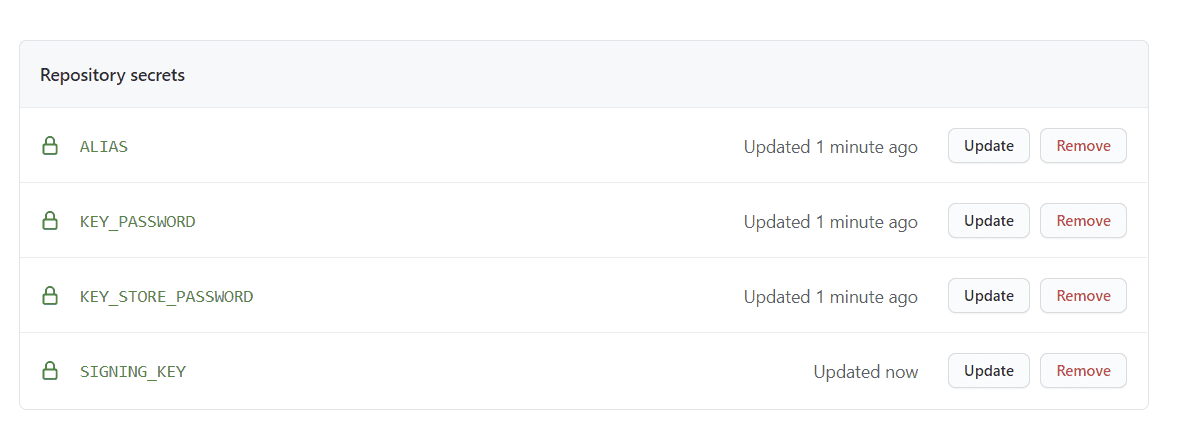
After completion, signing is ready.
Reconfigure paramters
In our terms of use, using our Services does not mean you can use our logo and your redistribution Services shall not intefere with our Services. Therefore, you should modify those contents to meet the agreements:
1. Modify application name
In AndroidManifest.xml(path:app\src\main\AndroidManifest.xml), modify android:label under application category. In the example, the value should be android:label="QZZN"
    <application
        android:allowBackup="true"
        android:icon="@mipmap/logo"
        android:label="QZZN"        android:networkSecurityConfig="@xml/network_security_config"
        android:supportsRtl="true"
        android:theme="@style/AppTheme.Default"
        tools:ignore="GoogleAppIndexingWarning"
        tools:targetApi="n">
International purpose
We understand some forums may have needs to provide multi-languages contents. In this case, keep the android:label as it is and modify app_name in string.xml
In a forum named Keylol, there is an Chinese name called "其乐".
In default string file(strings.xml and the path is app\src\main\res\values\strings.xml), change app_name to Keylol.
In Chinese string file(src\main\res\values-zh-rCN\strings.xml), the value shall be 其乐.
    <application
        android:allowBackup="true"
        android:icon="@mipmap/logo"
        android:label="@string/app_name"        android:networkSecurityConfig="@xml/network_security_config"
        android:supportsRtl="true"
        android:theme="@style/AppTheme.Default"
        tools:ignore="GoogleAppIndexingWarning"
        tools:targetApi="n">
2. Modify application ID
ID is unique to every application. The different application with the same ID will override other app's data and make critical inteference with the other one. Complying with our terms and for your convenience, you should use your own application id. Take QZZN(bbs.qzzn.com) as an example. According to the guidance of android developer, the application ID shall be com.qzzn.bbs.
In app's gradle file, modify applicationId in defaultConfig under android option to "com.qzzn.bbs". An example is given below:
android {
    compileSdkVersion 30
    buildToolsVersion "29.0.3"
    defaultConfig {
        applicationId "com.qzzn.bbs"        minSdkVersion 23
        targetSdkVersion 30
        versionCode 31
        versionName "3.10"
        testInstrumentationRunner "androidx.test.runner.AndroidJUnitRunner"
        manifestPlaceholders = [
                discuz_title: "NOT_IMPLEMENTED",
                discuz_base_url: "NOT_IMPLEMENTED",
        ]
    }
    ...
}
You will then modify application ID successfully.
Modify build type
In project's gradle file, you shall see the build types we provide:
- single:This is the exclusive build type and you should choose
- release: This type is the common app supporting multiple discuz site
- debug: Debug app should not be used in production environment
- qzzn: A QZZN example
Please modify discuz_title and discuz_base_url under single build type.
        single {
            // fill your bbs id
            manifestPlaceholders = [
                    discuz_title: "论坛名称(如:西北工业大学三行四方)",                    discuz_base_url: "服务网址(如:https://bbs.example.com)",            ]
            proguardFiles getDefaultProguardFile('proguard-android-optimize.txt'), 'proguard-rules.pro'
applicationIdSuffix ".bbs" }- discuz_title is the site name you provide. But the final name saved in device should be provided by mobile API.
- discuz_base_url is the url bbs serve. This parameter is vital. Most forums run directly on their domain, such as QZZN(bbs.qzzn.com). However, a sort of them, for example 1Points3Acres, have a path (https://www.1point3acres.com/bbs). You should carefully take a look on it. Besides, the protocol is important and use HTTPS if the server can. Although our app support URL redirect, HTTP protocol is still vulnerable to network attack or hijack.
- applicationIdSuffix will add a suffix value. In this case, the final ID will be com.qzzn.bbs.bbs.
Next, you should modify logo.
Change the icon
You shall use your own logo to comply with our terms and help build your copyright.
Prepare
We recommend you to use SVG, PNG and JPG to show your app and the size is suggested to be a square.
| | SVG | PNG、JPG | | ---- | ---- | ---- | | Property | Vector illustration | Bitmap | | Resoultion | Perfect | Good | | Compatibility | Can be bad when layers is overly much | Good |
Directly replace the file
The quickest way is to replace the PNG file(path:/app/src/main/res/mipmap-xxxhdpi/logo.png).
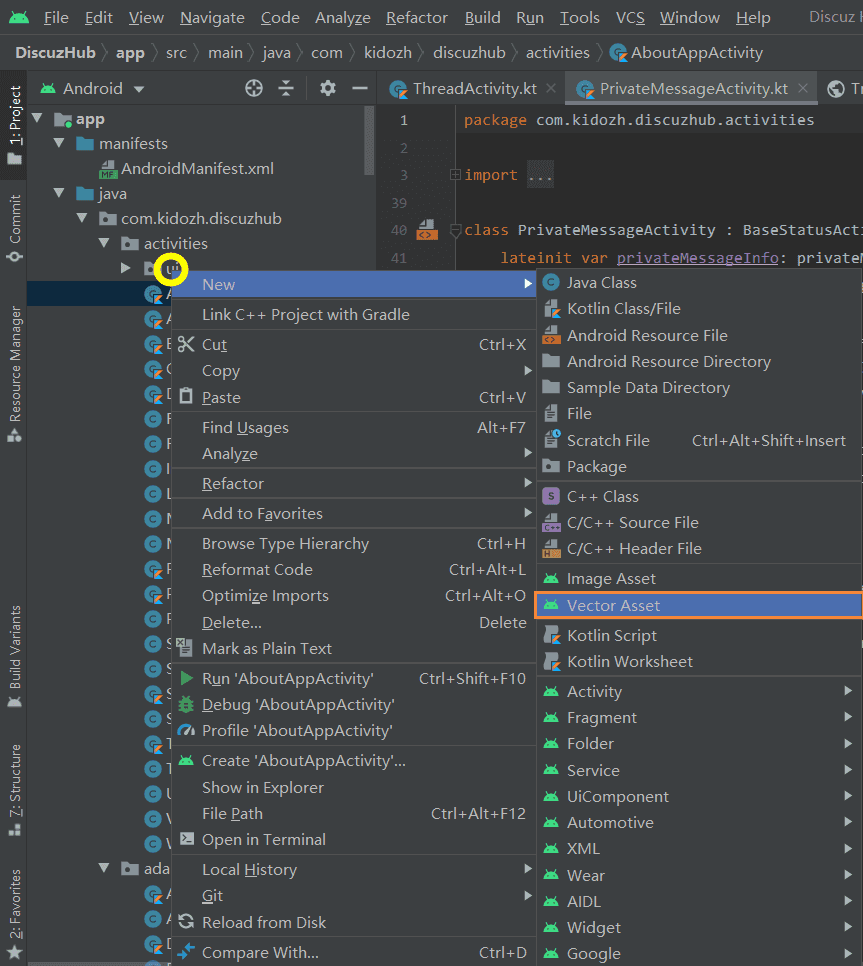
Import from Android studio
Right click at project view and the dialog will be triggered. Select New -> Vector Asset for Vector and New -> Image Asset for bitmap.
Select your picture and give the size(100×100 suggested).
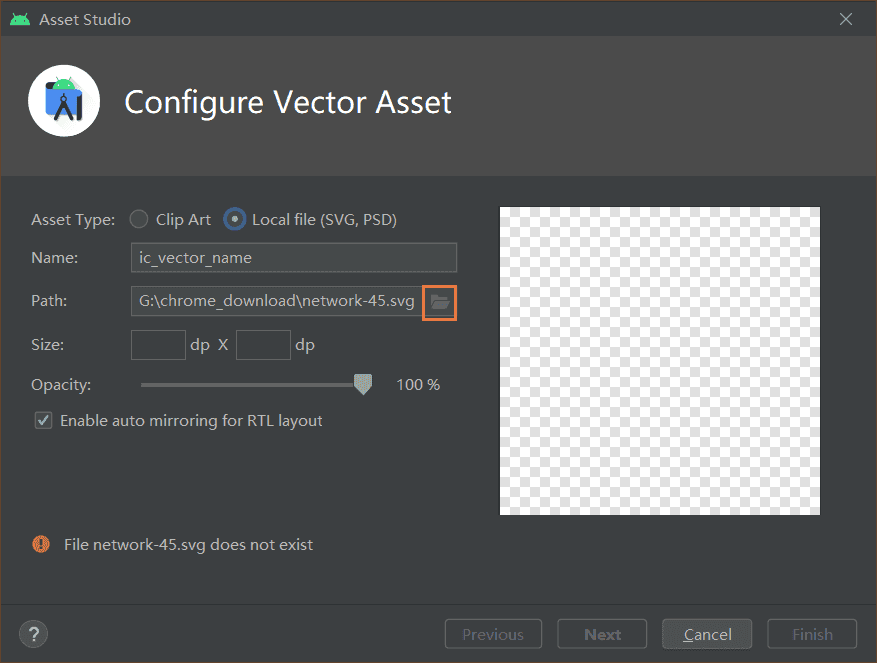
Press next
Change icon in Manifest
In file AndroidManifest.xml(path:app\src\main\AndroidManifest.xml), modify android:icon under application category. The value should be @drawable/resource_name for vector and @mipmap/刚刚生成的名字 for bitmap.
    <application
        android:allowBackup="true"
        android:icon="@mipmap/logo"        android:label="@string/app_name"
        android:networkSecurityConfig="@xml/network_security_config"
        android:supportsRtl="true"
        android:theme="@style/AppTheme.Default"
        tools:ignore="GoogleAppIndexingWarning"
        tools:targetApi="n">
Begin to compile apk
In github action, Click "Build Single apk" and run workflow to start compilation.
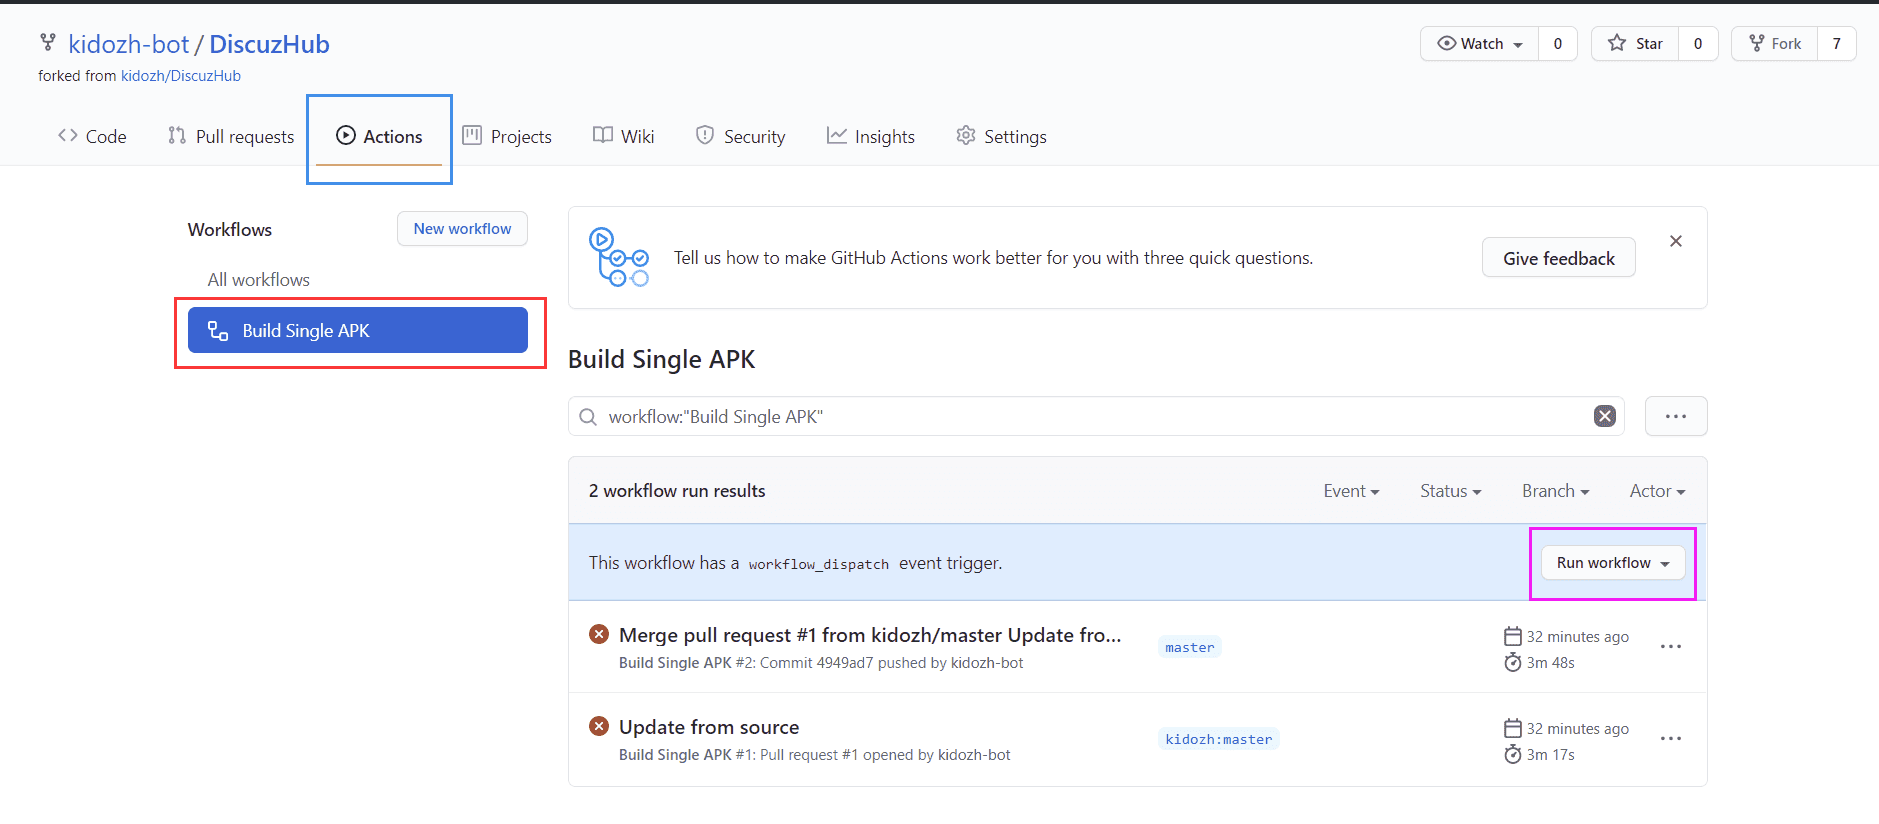
After that, click the result to get the file in artifacts.
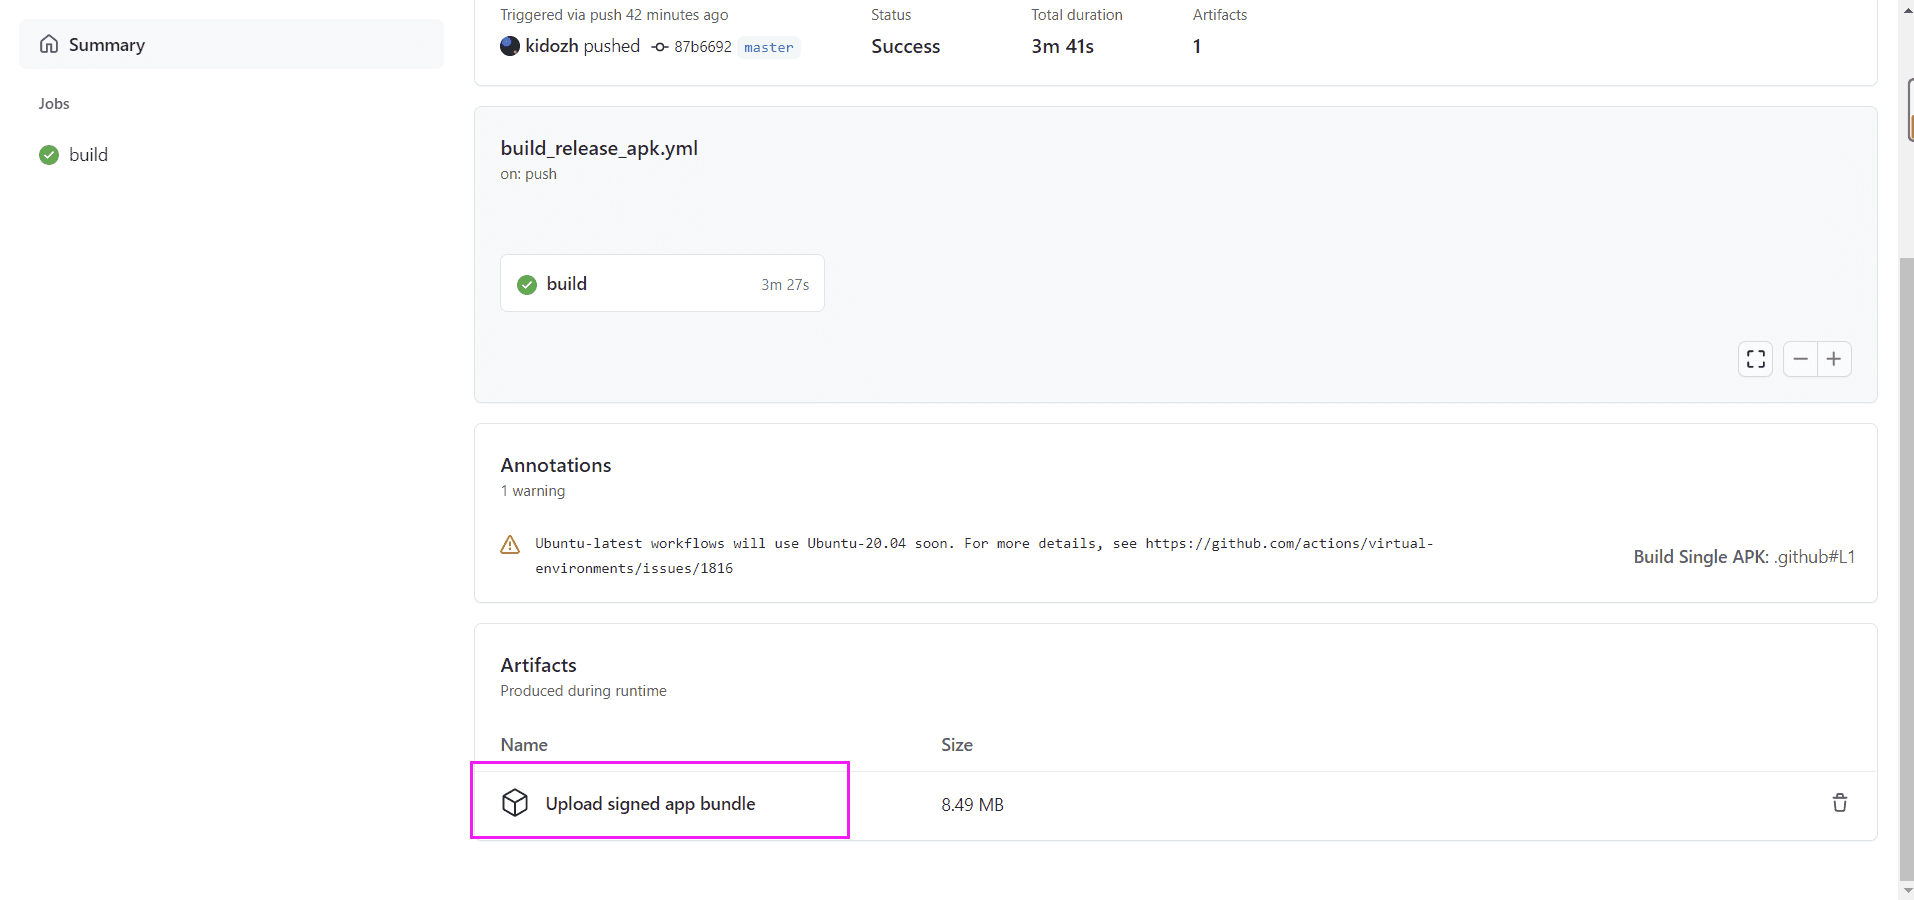
Decompress it and APK file is shown. You can use it to distribute your forum.
How to get it updated
By pull request
Support
If you have any questions, feel free to contact us for technical support.